Wishing you a day that sparkles ... Everybody-Art-Challenge #139

   [Enthält Werbung]


Hallo Ihr Lieben,

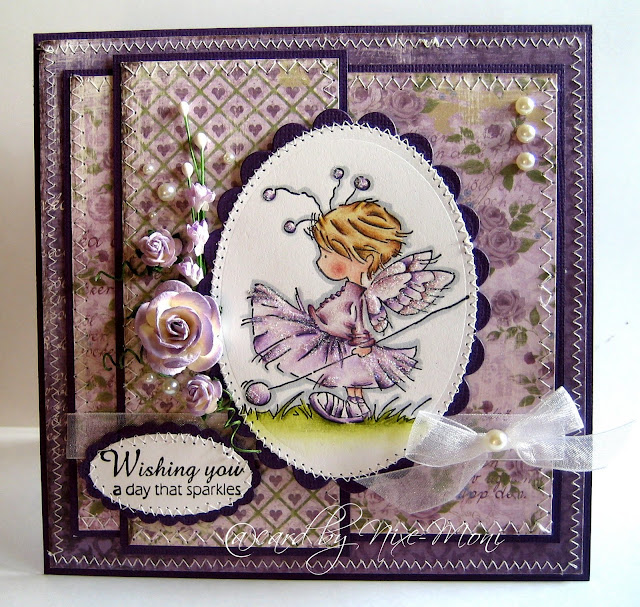
hier kommt meine neuste Karte, die ich für die Everybody-Art-Challenge gemacht habe. Wir möchten diese Woche gerne Eure Werke zum Thema *Feen* sehen.

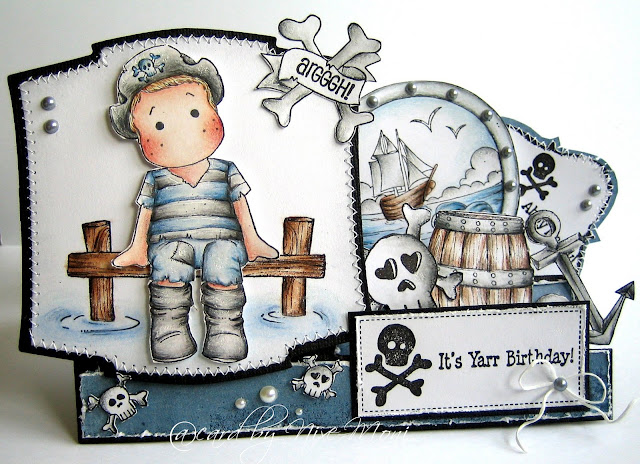
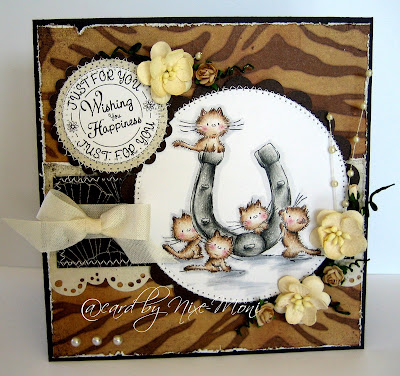
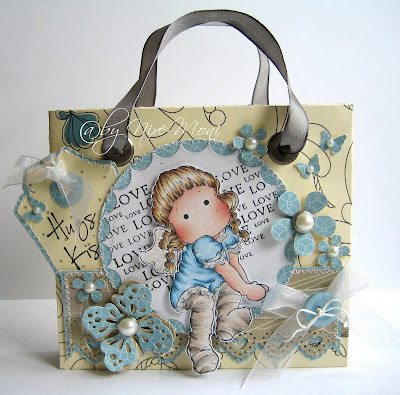
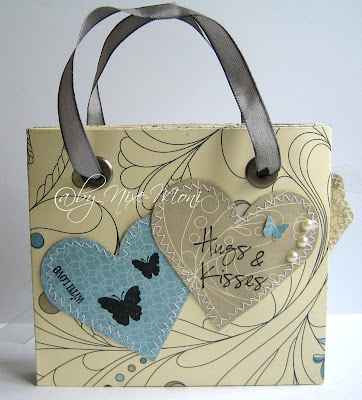
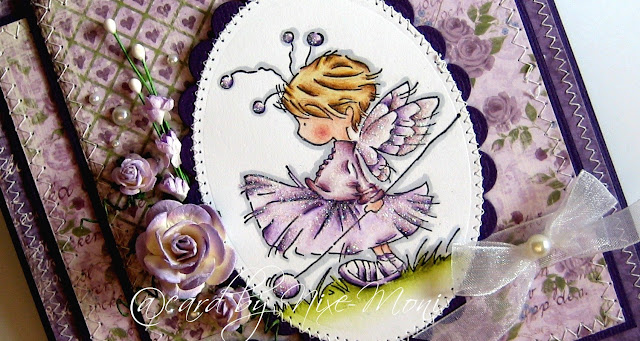
Ich habe mir diesmal tolles Papier von Maja Design ausgesucht, das ich mir in Zeist auf der ArtSpecially Messe mitgenommen hatte. Das süße Fairy Motiv *Pom Pom*, aus der Lili of the Valley Girlie Kollektion, habe ich passend dazu coloriert und deshalb kommt die Kleine diesmal ganz in lila daher ;o)

Den tollen Sketch findet Ihr bei der Challenge von The Sweet Stop.

Vielen Dank für´s Vorbeischauen und habt einen tollen Tag.


Hi dear all,

today I would like to show you my latest card of me, which I´ve made for the new Everybody-Art-Challenge. This week we would love to see your creations to the theme *Fairies*.

I selected this time some great papers from Maja Design, which I found on the ArtSpecially event in Zeist and I coloured the sweet image *Pom Pom* from the Lili of the Valley Girlie collection suitably to it.

You can find the great sketch over at this weeks challenge of The Sweet Stop.

Thanks for swinging by and have a wonderful day.

Hugs  
Nixe-Moni

Colours I`ve used:
Haut/Skin: Light Peach, Peach, Henna
Haare/Hair: Cream, Yellow Ochre, Sienne Brown, Dark Brown, Black
Shirt: Greyed Lavender, Rosy Beige, Clay Rose, Henna, Black Grape, Black

Rock & Schuhe/Rock & Shoes: Greyed Lavender, Lilac, Parma Violet, Violet, Black
Gras/Grass: Limepeel, Marine Green, Dark Green

It´s Yarr Birthday ... Bunny Zoe´s Crafts Monthly Challenge

                                 [Enthält Werbung - unbezahlt]

Hallo Ihr Lieben,

heute möchte ich Euch wieder eine Karte von mir zeigen, die ich für die neue Bunny Zoe´s Crafts Monthly Challenge gemacht habe. Wir haben diesmal das Thema *Jungskarte* und ich bin schon gespannt was Euch schönes dazu einfällt.

Ich habe lange überlegt was ich wohl machen könnte und bin dann zu dem Entschluß gekommen eine Side Step Karte zu machen, denn so konnte ich viele Motive aus der Fairytale Kollektion verwenden, die ich für eine Jungskarte geradezu perfekt fand. Genauso wie die Sprüche von Kimmie´s Sentiments, denn sie sind auch wie gemacht für Jungs- oder Piratenkarten.

Vielen Dank für´s Vorbeischauen und habt eine schöne Woche :o)


Hi dear all,

today I would like to show you another card of me, which I´ve made for the new  Everybody-Art-Challenge Blog. This time we would love to see your creations to the theme *one for the boys*.

I thought a Side Step Card is just perfect for Pirate Edwin, because I had a lot of place to put all the fab images of the Fairytale Collection on it, which are perfect for a boys card. As well as Kimmie´s Sentiments, they are fabulous too for boys or pirate cards.

Thanks for stopping by and have a great week.

Hugs
Nixe-Moni


Colours I`ve used:
Haut/Skin:
Light Peach, Peach, Henna
Haare/Hair:
Cream, Sienne Brown, Dark Brown
Shirt, Hose, Hut & Schuhe/Shirt, Pants, Hat and Shoes:

Fass, Schiff & Totenköpfe/Barrel, Ship & Skulls:

Lili of the Valley ... Lucky Cats

   [Enthält Werbung]


Hallo Ihr Lieben,

hier bin ich mal wieder, mit meinem neusten Werk  ...

Es ist eine Karte, für die ich mir diesmal das süße Motiv *Lucky Cats* aus der neuen Spring Kollektion von Lili of the Valley ausgesucht habe. Absolut super schön fand ich dazu das tolle Papier *Granola* von Basic Grey, das ich mir auf der Creativa in Dortmund mitgenommen hatte und nun endlich zum Einsatz kam.

Den Sketch von Truly Scrumptious fand ich perfekt für mein Motiv und kam mir deshalb wie gerufen und bei The Crazy Challenge sollen wir *Blumen* auf unseren Karten verwenden. Außerdem möchte das Team von der Challenge Anything Goes gerne *Perlen* auf den Werken sehen.

Habt noch ein tolles Wochenende und vielen Dank für´s Vorbeischauen.


Hi dear all,

here I am again with my latest creation ...

It´s another card and therefore I have chosen the sweet image *Lucky Cats* of the new spring collection from Lili of the Valley. I also selected some great papers of the *Granola* Collection from Basic Grey, thought it fits perfectly to the cute image.

You can find the great sketch over at the challenge of Truly Scrumptious and at The Crazy Challenge we should *Just Add Flowers* on the creations. As well, the team of the challenge of Anything Goes would love to see *Pearls* on the works.

Have a wonderful weekend and thanks for swinging by.

Hugs
Nixe-Moni


Colours I`ve used:
Hufeisen/Horseshoe: White, Cool Grey 20%, Cool Grey 50%, Black
Katzen/Cats: Seashell Pink, Sienna Brown, Dark Brown, Black, Pink Rose, Henna

Kleine Geschenktasche / Small Gift Bag ... Step by Step

  [Enthält Werbung - unbezahlt]

Hallo Ihr Lieben,

ich möchte Euch heute gerne in einer Schritt für Schritt Anleitung zeigen, wie man eine kleine Geschenktasche selber machen kann. Die Idee stammt von den Splitcoaststampers und ich finde, mit so einer kleinen Tasche, kann man recht schnell einem lieben Menschen eine Freude machen, denn sie ist wirklich einfach nachzumachen.
***
Hi dear all,

today I would like to show you step by step, how to make a small gift bag. I found the idea over at the Splitcoaststampers and I think, this bag is a lovely gift for a loved one, because it´s quite quickly and really simple to prepare.

Ihr benötigt folgende Materialien:

- Scor-Pal Bord
- einen Bogen gemustertes Papier, 30,5 x 30,5 cm (12" x 12")
- doppelseitiges Klebeband
- Eyelets oder Brads
- Schere
- Eyelet Werkzeug
- Schleifenband
***
What you need:
- Scor-Pal board
- one peace of patterned paper 12" x 12"
- double sided adhesive tape
- eyelets or brads
- scissors
- eyelet tool
- ribbon


Legt das Papier, mit der Seite die Ihr außen haben möchtet (falls es doppelseitig ist), nach unten auf das Scor Pal Bord und falzt es bei 1" (2,54 cm) und bei 11" (27,94 cm).
***
Put your paper, with the page that you want to have outside (if it´s double-sided), downwards on the scor pal board and score at 1" and 11".


Danach faltet Ihr das Papier entsprechend und fixiert es mit doppelseitigem Klebeband.
***
Then fold the paper at the scored lines and fixed it with double sided adhesive tape.


Nun dreht Ihr das Papier um 90° und falzt es bei 3 1/2 " (8,89 cm) und 8 1/2 " (21,59 cm). Auch hier faltet Ihr das Papier wieder entsprechend an der gefalzten Linie ...
***
Now turn the paper 90 degrees and score at 3 1/2" and 8 1/2 ". Fold the paper on the scored lines again ...


... und klebt dann die gefalzten Seiten überlappend zusammen, sodaß ein länglicher Schlauch entsteht.
***
... and adhere the folded pages overlapped to a flat tube.


Falzt das Papier nun bei 4,5" (11,43 cm), 5" (12,7 cm) und 5,5" (13,97 cm) und achtet darauf, dass die Außenseite nach oben liegt. Danach wird das Papier zuerst in der Mitte gefaltet.
***
Score now at 4,5", 5" and 5,5" and make sure that the outside is pointing to the top. Then fold the paper first in the middle.


Faltet das Papier nun weiter an den gefalzten Linien, erst nach links und dann nach rechts und legt dann das Papier so, dass die Außenseite wieder nach unten zeigt.
***
Then fold the paper on the scored lines, first to the left and finally to the right. Now the outside of the paper should be again upside down.


Auf einer beliebigen Seite wird nun ein kleines Stück doppelseitiges Klebeband, in die Mitte des oberen Randes, fixiert. Damit wird die Tasche zusammengeklebt, die nun von alleine stehen sollte.
***
Now stuck a small piece of douple sided adhesive tape in the middle at the top of one page and glue the bag together. It should now be able to stand on its own.


Nun ist es fast geschafft ... jetzt werden nur noch die Eyelets mit dem Eyelet Werkzeug angebracht und die Schleifenbänder durchgezogen. Ihr könnt auch Brads verwenden, diese werden dann einfach nur durch das Schleifenband und das Papier gedrückt und entsprechend fixiert.
***
At this point you have almost managed it ...now you only have to fix the eyelets with the eyelet tool and pull the ribbon through the eyelets. You can also use some brads, who just pushed through the ribbon and the paper.


Meine Schleifenbänder sind je ca. 30 cm lang und damit es einen schönen Abschluß gibt, habe ich ein ca. 2 - 3 cm breites Stück doppelseitiges Klebeband an das Ende eines jedes Bandes angebracht um es so zusammenzukleben.
***
My ribbons are about 30 cm long and for a great finish I fixed some 2-3 cm wide piece of double sided adhesive tape at the end of each ribbon and stick it together.


Die Tasche ist nun fertig und kann jetzt nach herzenslust dekoriert werden.
***
The bag is now finished and can be decorated to your heart´s content just as you like.


Rückseite / backside


Vielen Dank für´s Vorbeischauen und ich wünsche Euch viel Spaß beim Nachbasteln.
***
Thanks for swinging by and I hope you have fun making your own gift bag.


Hugs  
Nixe-Moni